Clearing the Cache in Chrome
From time to time it is helpful for a user to clear the cache in their web browser to help clear up some issues that can appear on websites. If you are running into these issues you can follow these simple instructions.
Open the Chrome Browser
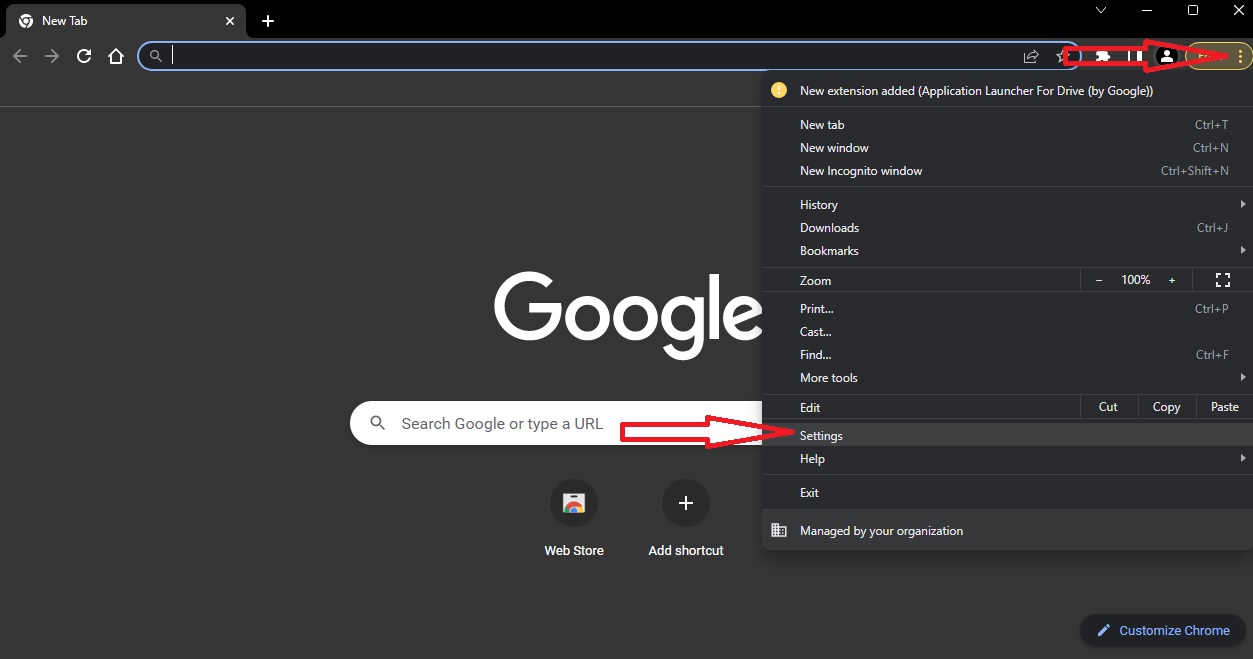
In the browser window look to the top right corner and click on the vertical ellipsis (three stacked dots) button. Look for the "Settings" option and click on it.
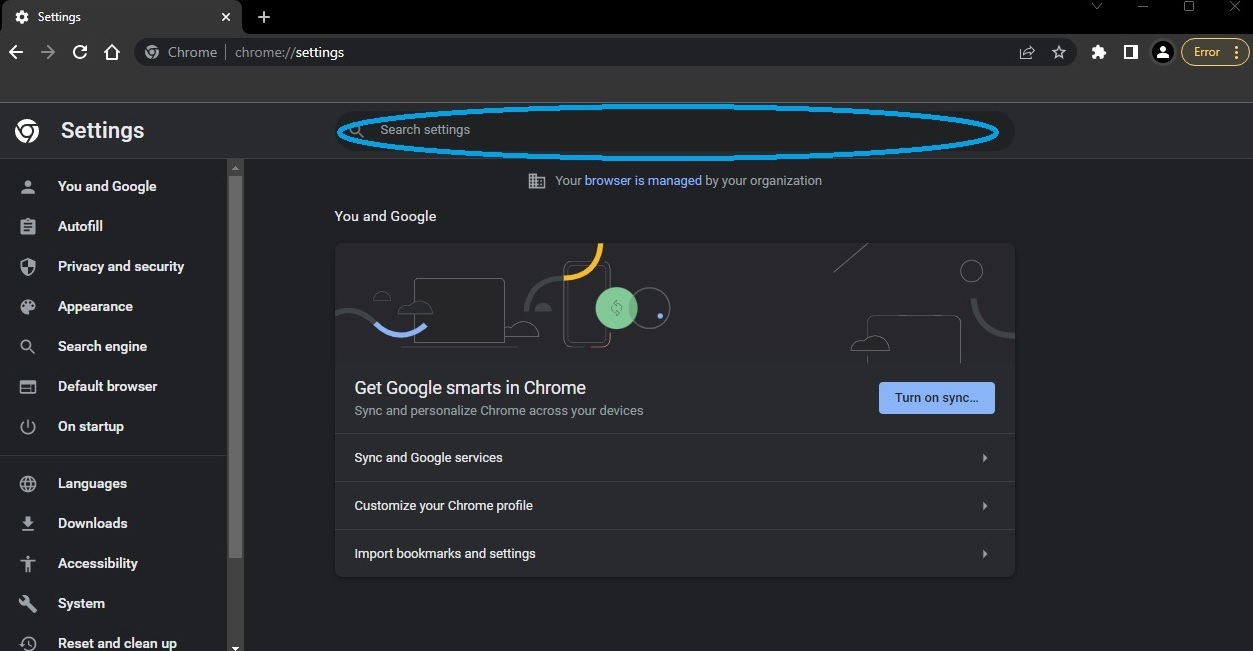
In the settings page that opens, you should see a search settings bar in the top middle of your page
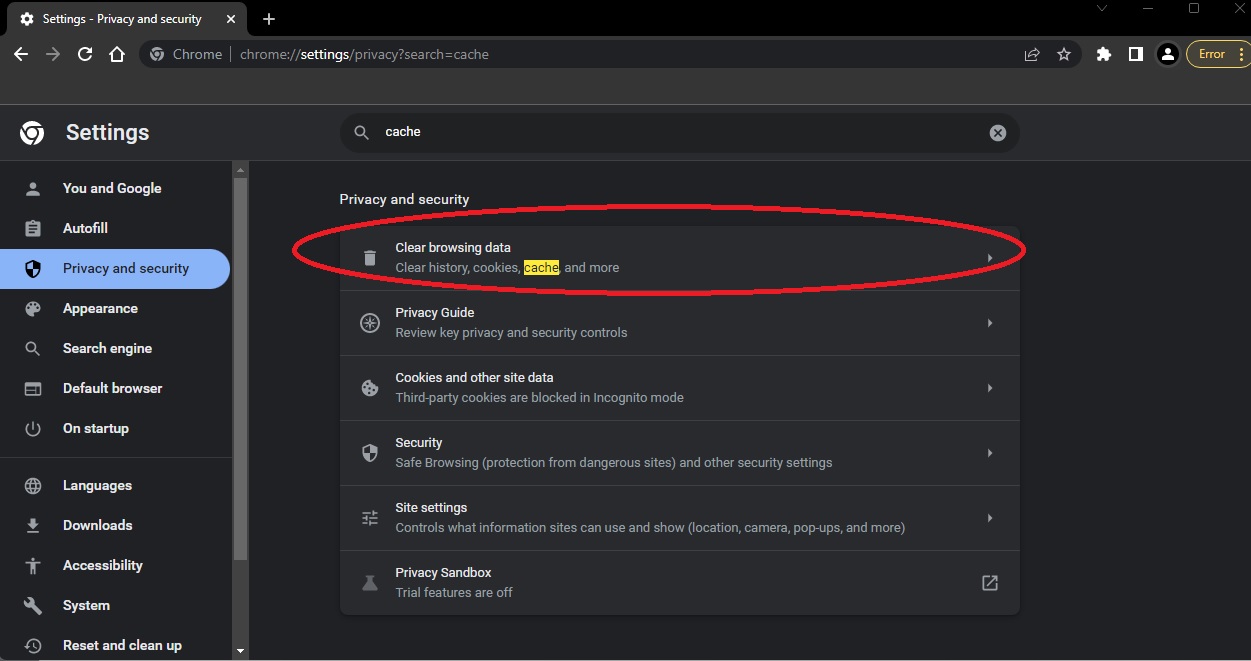
In the search settings, you will type the word "cache". This should filter the page and highlight the area you need to go into in order to clear your cache and browser history. You are looking for the menu button that says "Clear browsing data". Once you see it click on that menu to open up the options.
In the box that opens, you should see two tabs. Most users should focus on using the "Basic" tab. In this tab, the first step will be to click on the "Time range" dropdown and select "All Time". Unselect Browsing History if you prefer to keep this intact.
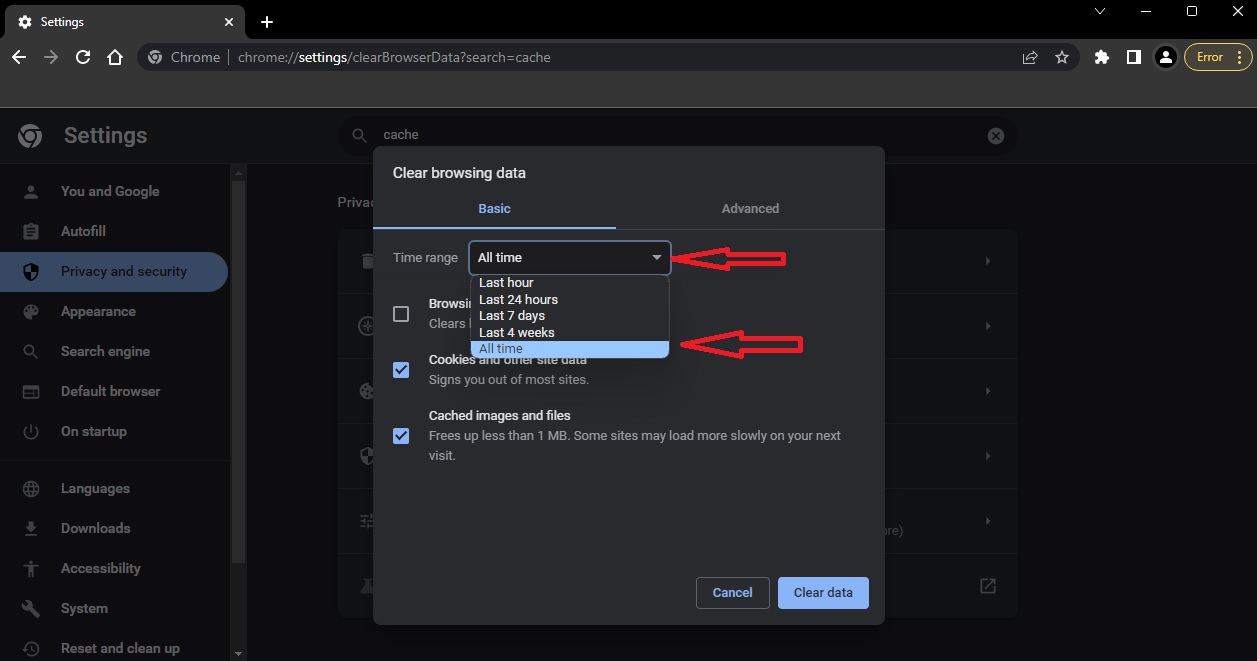
Next, you will click the "Clear data" button. This should clear all the basic caching info that would be disturbing your experience with certain web pages.
NOTE: This also will clear your autofill and possibly some of your passwords. It will also cause pages to load slower the first time. This is normal and expected so that you can get a fresh version of the web page rather than the old code that may have been causing you issues on particular pages.
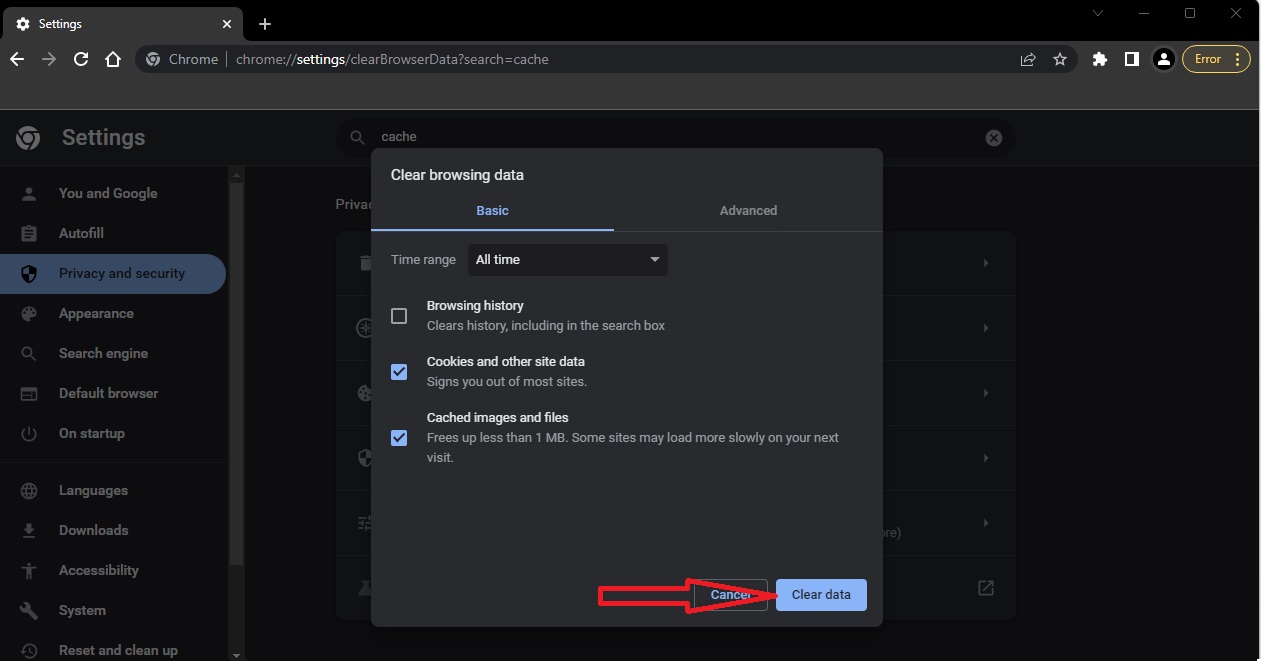
At this point, you will want to exit Chrome completely and then open a fresh browser/browser session. You can then navigate to the page you were having issues with and the most recent version of the code should load and you are on your way.
